FAQ | Sincerely Sunday
Explore our FAQ to learn about our clean burning coconut soy wax blend, the benefits of Deconstructed Candles™, our eco-friendly candle refill and making kits, and essential candle care tips. From burn time to wick trimming and fixing candle tunneling, we’re here to help you get the most from your candles.
Candle Ingredients
We use a proprietary coconut soy wax blend because it allows us to create clean burning candles that are both eco-friendly and sustainable. This blend produces less soot, improves air quality, and burns more slowly -- giving you more hours of enjoyment with each candle.
It’s also a pet-friendly and planet friendly choice, making it safe to enjoy around the people and animals you love.
Coconuts and soybeans each bring unique sustainable benefits, making them a thoughtful foundation for our clean burning candles crafted from a coconut soy wax blend:
The Benefits of Coconut Wax
- Absence of pesticides: Coconuts are naturally pesticide free, requiring fewer harmful chemicals.
- Minimal heavy machinery: Harvesting often relies on manual labor, providing employment opportunities for local farmers and supporting eco friendly and sustainable practices.
- No waste: Every part of the coconut is utilized, from water to husk, for food, decor, and dishware.
- No major deforestation links: Current farming practices don’t significantly contribute to deforestation, making coconut wax a planet friendly option.
The Benefits of Soy Wax
- Renewable resource: Soybeans are grown annually, making them a readily renewable crop.
- Biodegradable: Soy wax breaks down naturally, reducing its environmental impact and making it an ideal choice for eco friendly and sustainable candles.
- Cleaner burning: Produces less soot compared to paraffin wax, contributing to better air quality and maintaining the clean burning candles promise.
- Supports local farmers: Many soybeans are grown in the U.S., supporting agriculture and the economy.
While both coconut and soy have their challenges—such as the need for sustainable land use as demand grows—we are committed to supporting responsible cultivation methods and minimizing our environmental footprint.
By combining the strengths of these two waxes, we create candles that are not only high-performing but also align with our vision of a more sustainable, planet friendly, and eco friendly future.
Our candles are made with a coconut soy wax blend, delivering clean burning candles that are both planet friendly and eco friendly and sustainable. We use a blend of fragrance and essential oils that are non-toxic, phthalate-free, dye-free.
The wicks are cotton woven with paper threads and coated in wax for a consistent, even burn every time.
Whether you’re refilling a favorite vessel with our candle refill kit or making a new candle from scratch, our ingredients are carefully chosen to support sustainability and safety.
Our full list of ingredients and materials can be viewed here
Our candles feature a coconut soy wax blend designed for a slow burning candle experience, lasting up to 50+ hours. To get the most out of your candle, proper care is key.
- Always trim your wick to about ¼ inch before each burn to ensure a clean, even flame.
- On your first burn, let the candle melt across the entire surface, creating a full melt pool -- this helps prevent candle tunneling, where wax builds up unused on the sides.
- Avoid burning your candle all day; instead, extinguish your candle after a few hours to maintain an even burn and keep it lasting longer.
Following these simple steps will help you enjoy your candle’s fragrance and glow for many hours.
Check out our Candle Care guide for more tips and tricks on how to make your candle last longer.
Candle Making / Candle Refill Kits
Deconstructed Candles™
Our Deconstructed Candle is both a candle refill kit and a candle making kit, giving you everything you need to learn how to make a candle at home in just minutes. Whether you’re refilling a favorite vessel or creating a new candle from scratch, it’s a fun, beginner-friendly experience—no tools or mess required.
Consider it a luxury candle making kit for beginners, made for anyone who wants a clean, planet-friendly burn with ease.
Here's how it works:
- Select Vessel: use a vessel that is approximately 3" wide that can withstand heat, won't leak, crack, or catch on fire.
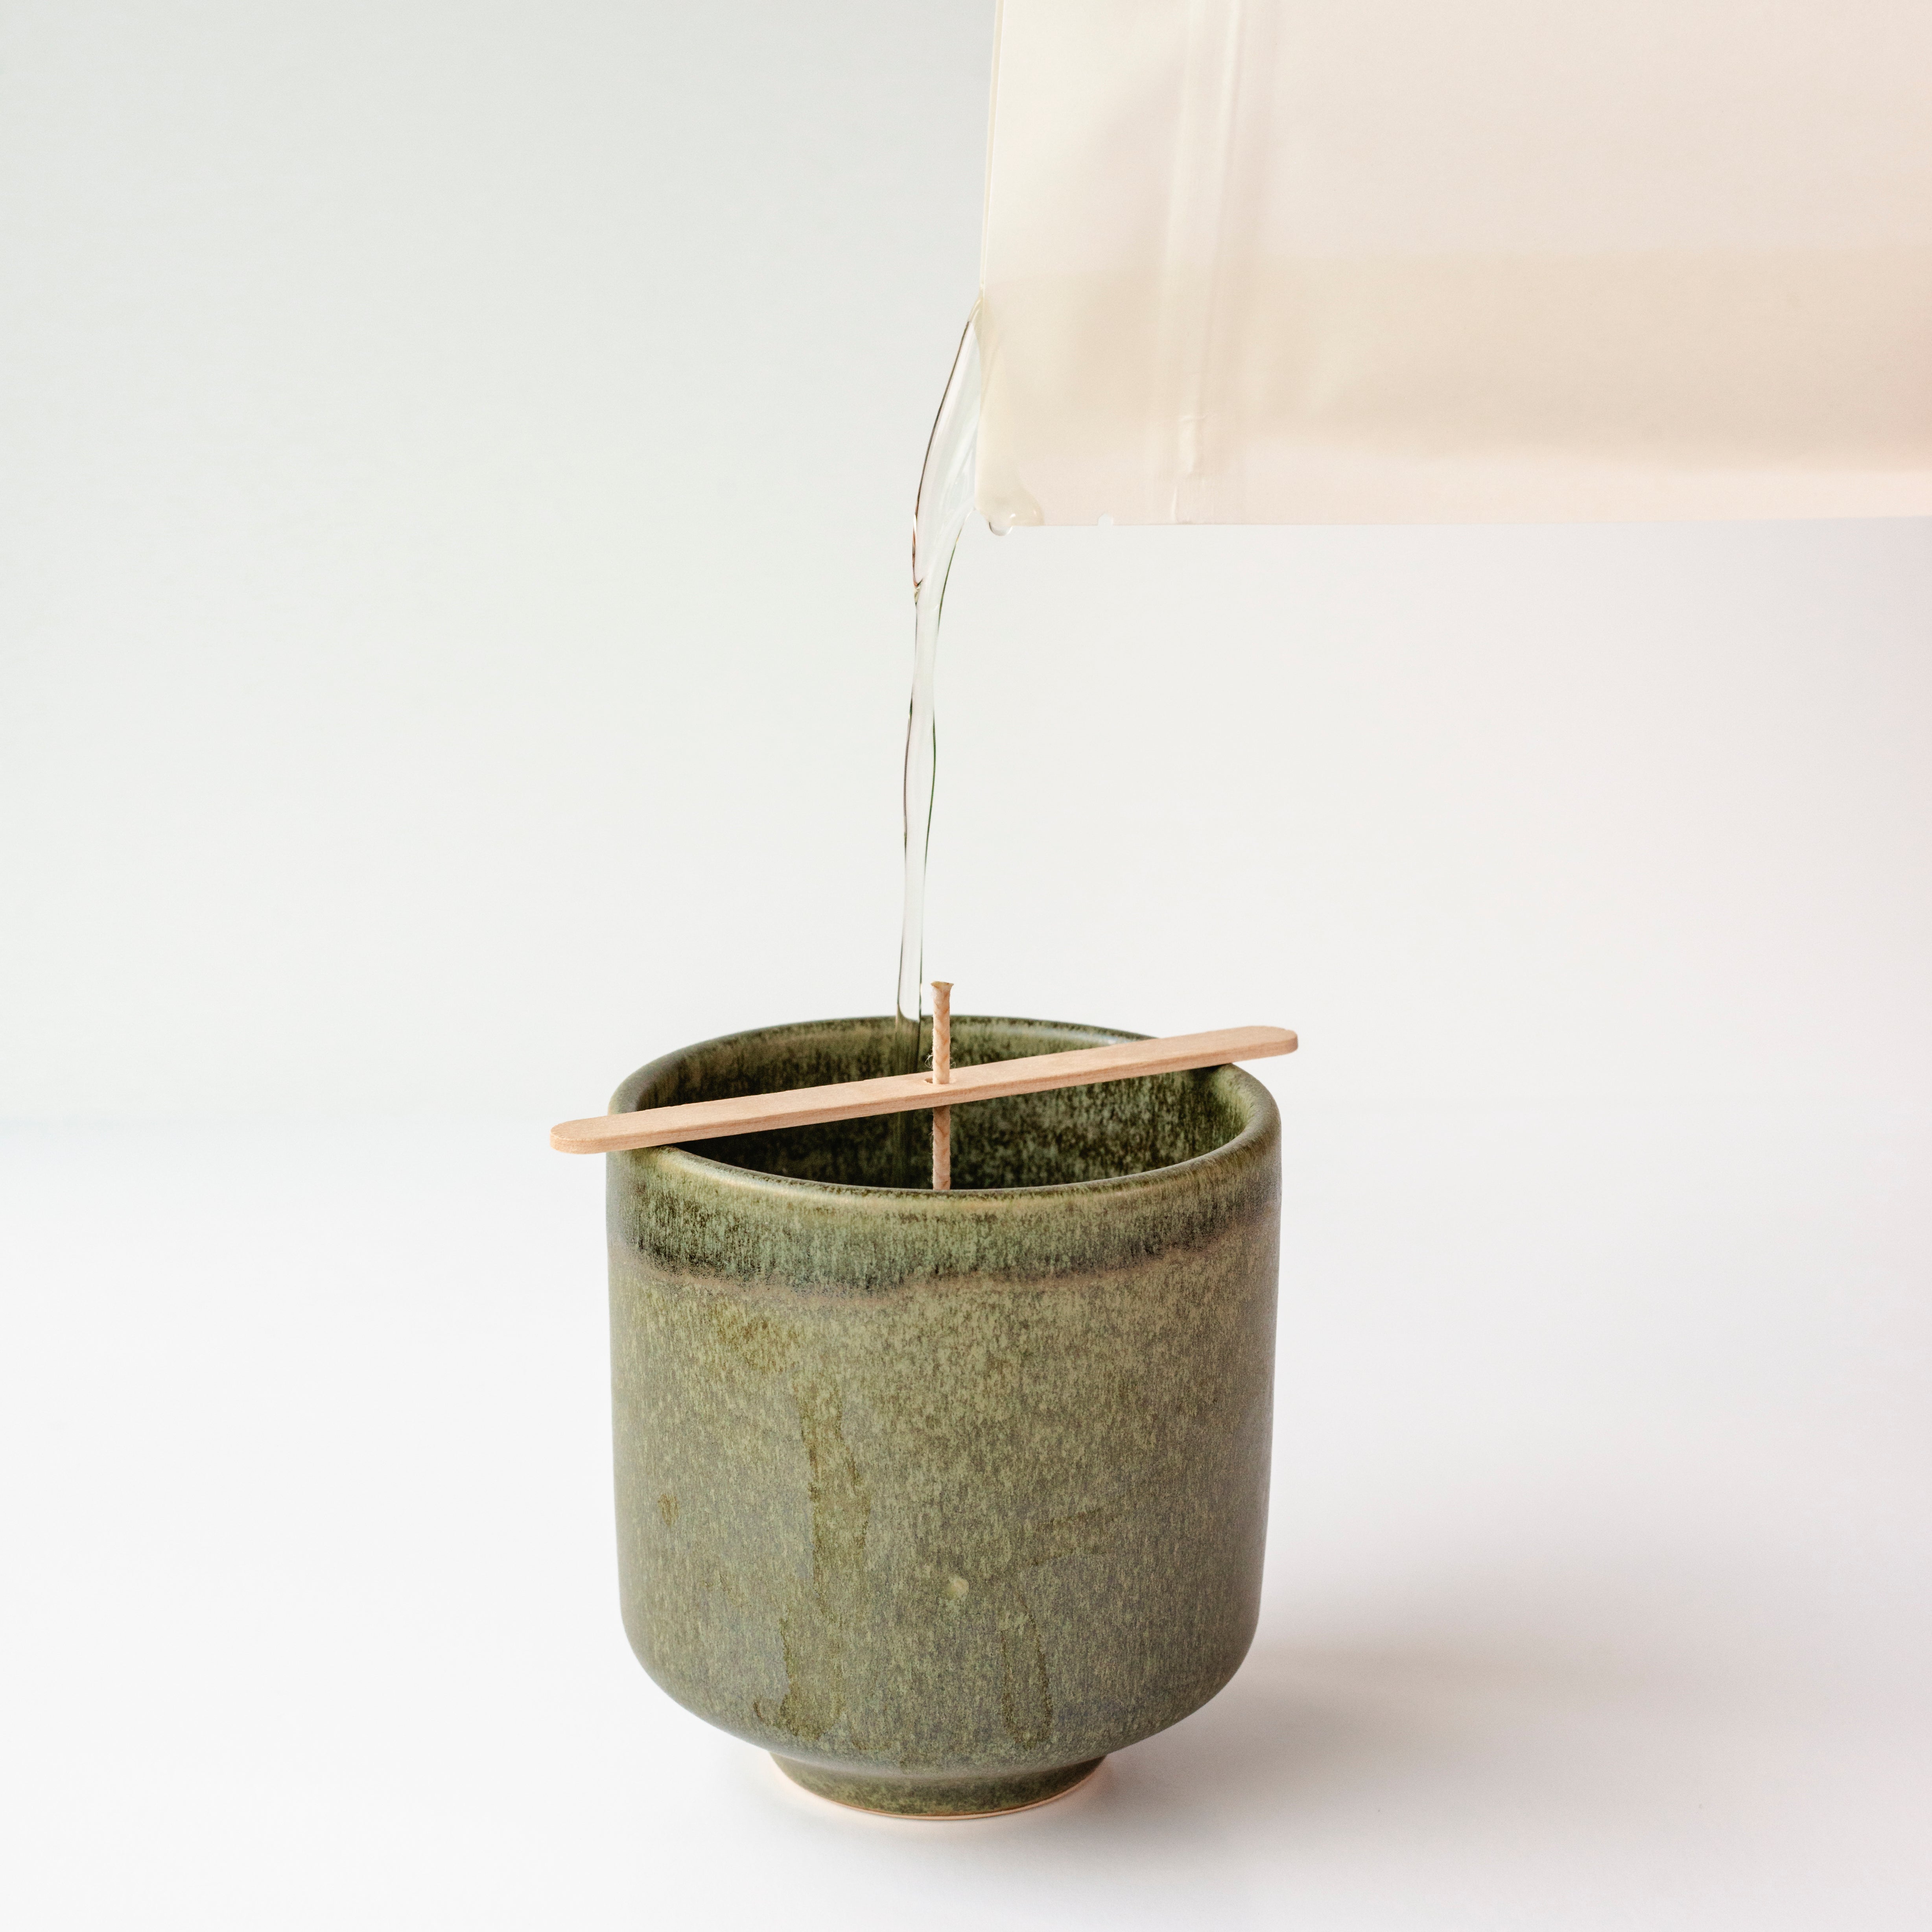
- Prep Vessel: place the wick in the center of your vessel, using the wick holder to secure it in place.
- Melt + Pour: place wax bars into the pouch and microwave for 2 minutes or until the wax has fully melted. Once the bag is cool to touch, pour the liquid wax in your vessel.
- Cool + Enjoy: let your candle cool for approximately 3 hours. Trim wick to 1/4” and enjoy!
For full, step-by-step instructions, view here
Our candle refill kits are made to help you repurpose vessels you already love—an easy, planet friendly way to reduce single-use waste and push back against throwaway culture.
But if you’re starting from scratch, even better!
This is where the creativity begins -- choose a vessel that reflects your personality, complements your space, and turns your candle into something uniquely yours. Whether it's a vintage mug, a ceramic bowl that matches your aesthetic, or a glass jar that complements your space, your candle becomes as unique as you.
As a general rule, choose a vessel that:
- Is approximately 3" wide
- Is heat-safe and non-flammable
- Won’t leak, crack, or shatter
Ideal vessels include:
- Thick glass jars
- Glazed ceramic
- Sealed concrete containers
- Metal tins
Candle Care
There are many ways to clean your vessels, and the best method depends on your preference and what works best for you. Here are some of the easiest and most common techniques:
1. Scoop Method
- Take a spoon and scoop out the leftover wax
- Place wax in a sealed container and save for future use
- Wash vessel with wam soap and water
2. Freezer Method
- Place the candle in the freezer for a few hours or overnight
- The wax will harden and shrink, making it easy to pop out with a spoon or butter knife
3. Boiling Water Method
- Pour boiling water into the vessel, leaving some space at the top
- The wax will melt and float to the surface as it cools; once solidified, you can remove the wax and clean out any residue
4. Oven Method
- Remove all labels
- Preheat your oven to 180°F (82°C), and place the vessel on a baking sheet lined with aluminum foil or parchment paper
- After a few minutes, the wax will melt; pour it out and clean with warm soap and water
For detailed instructions on each method, click here
With the right candle care, our candle refill kits, made with a coconut soy wax blend, can burn for up to 50+ hours—but how long they last ultimately depends on how you treat them. If you’re wondering how to make candles last longer, it really comes down to a few simple habits that help prevent candle tunneling and ensure a consistent, slow burning experience.
Here’s how to get the most from your candle refill kit:
- Trim your wick to ¼" before each burn to avoid excess soot and candle mushrooms.
- On the first burn, allow the wax to fully melt across the surface to create an even melt pool and prevent tunneling.
- Extinguish your candle after 3–4 hours (timing depends on the size of your candle) to avoid burning through it too quickly—longer burns speed up the candle’s consumption.
- If your wick leans to one side, recenter it while the wax is still soft as needed.
- Avoid leaving your candle burning unattended or all day.
These easy steps help extend the life of your candle while delivering the clean, even burn our planet-friendly, candle refill kits are known for.
Check out our Candle Care guide for more tips and tricks on how to make your candle last longer.
How you extinguish your candle is entirely up to you—there’s no right or wrong way!
That said, the method you choose can affect its performance and cleanliness. Here’s a quick guide to some common options, along with their pros and cons:
1. Blowing Out the Flame
- Pro: Quick and easy—no tools needed!
- Con: Produces smoke and soot, which can leave a lingering smell and dirty the wax.
2. Using a Wick Dipper
- Pro: Extinguishes the flame without smoke for a cleaner burn, removes dirt and debris, and scrapes off excess wax from the sides.
- Con: None :)
3. Using a Wick Snuffer
- Pro: Safely puts out the flame without wax splatter or smoke.
- Con: Can be a bit bulky
You should trim your wick before lighting your candle each time to ensure a slow burning, safe, and clean experience.
Keeping your wick trimmed helps prevent excess soot buildup and reduces the chance of forming a candle mushroom—those blackened, uneven wick tips that can cause uneven burning. A properly trimmed wick promotes a steady flame, which means your clean burning candle burns more efficiently and lasts longer.
Regularly trimming the wick is one of the simplest yet most important steps in candle care for getting the best performance from your candle refill kit!
Wick trimming is essential for getting the best from your candle refill kit and clean burning candles. Regularly trimming your wick helps ensure a safer, longer-lasting, and more enjoyable candle experience.
- Cleaner burn: Trimming your wick reduces excess soot and smoke, keeping your air fresh and your candle looking pristine.
- Improved performance: A properly trimmed wick creates a steady, even flame that promotes consistent melting and prevents candle tunneling.
- Longer burn time: A smaller flame burns slower, extending the life of your slow-burning coconut soy wax blend candle.
- Enhanced safety: Shorter wicks prevent high flames and overheating, reducing the risk of jar damage and making your candle safer to enjoy.
By trimming your wick before each burn, you maximize the benefits of your eco-friendly, planet-friendly candle refill kit while enjoying a cleaner, safer candle experience.
Candle tunneling happens when the wax burns down the center, leaving a ring of unmelted wax along the edges. This uneven melt pool can waste wax and shorten your candle’s burn time. Fortunately, fixing a tunneled candle is simple with these methods:
- Foil Method: Wrap a piece of foil around the top edges of your candle, leaving the wick exposed. The foil traps heat, helping the wax melt evenly and fill the tunnel. Let it burn for 1–2 hours until the surface is smooth. This easy, low-effort fix requires a bit of patience.
- Wick Dipper Method: Light your candle until a melt pool forms, then use a wick dipper to extinguish the flame. Afterward, scrape the excess wax from the edges into the melted pool. If you don’t have a wick dipper, you can use a butter knife instead. This instantly fixes tunneling and restores an even burn.
Both techniques help you get the most out of your candle refill kit by preventing wasted wax and promoting a clean, slow burn.